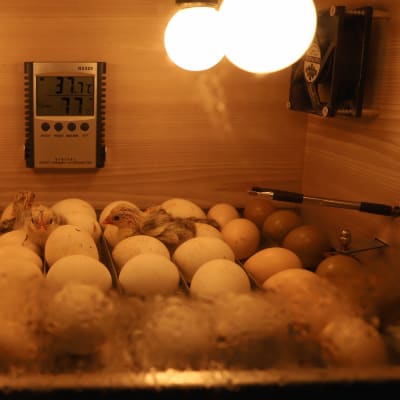
Spring has sprung! From spring cleaning to seeding your garden, this can be a busy time of the year. What we are most excited for is hatching our first group of chicks! Let’s go over what you need to know before you hatch chicken eggs at home in an egg incubator.
How to tell if your Chicken Eggs are Fertilized Eggs
In one of our recent blogs, we talked about how to tell if you have fertile chicken eggs. It’s as simple as cracking open an egg and evaluating the yolk for an external portion referred to as a blastoderm.
In an infertile egg, this will appear as a solid white dot. If the eggs are fertile, the dot will be transparent in the center—kind of like a Cheerio. This fertile "dot" is considered the blastoderm and contains the first cell of the newly developing chick.
Check out our blog on parts of a chicken egg for more details on that. Here, we want to talk about hatching eggs with an incubator at home in 21 days! You read that right—after a short, 21-day incubation period, your eggs will turn into adorable baby chicks!

What to do Before Hatching Eggs
There are just a couple things you need before hatching eggs at home.
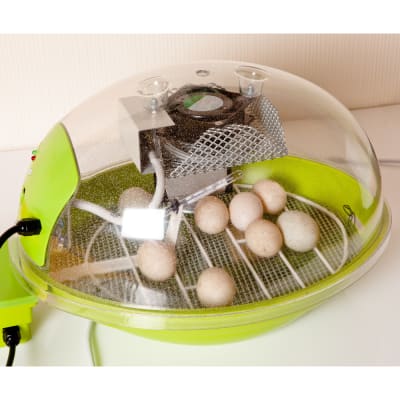
Choose an Incubator
The first step is choosing an incubator. There are many incubator varieties to choose from in stores and online. You could use a still air incubator, forced air incubator or even a homemade incubator. However we recommend getting an incubator with a built-in temperature and humidity gauge, the ability to turn the eggs automatically (so you aren’t spending too much time turning eggs manually) and a viewing window so we can watch the chicks hatch when the time comes.
These instructions are for those who want to use an egg incubator. If you have a broody hen, she can also hatch chicken eggs for you. But that's a completely different topic!

Choose your Eggs
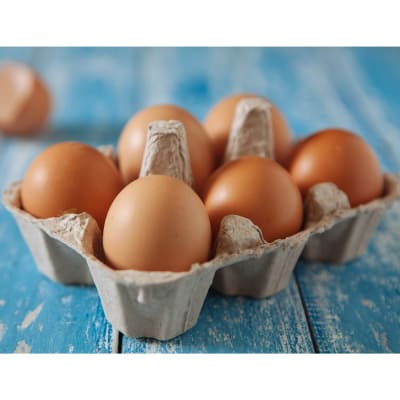
Next is choosing the right eggs to incubate! Lots of factors can affect the hatchability of home eggs. You want eggs that are average size and nicely shaped—try to stay away from anything that is elongated or super round. This will make sure that the growing embryo has enough room to do its thing!
Floor or ground eggs typically have lower hatching rates than those laid in a nest box. So, if you're able, try to hatch eggs you find in your nests. You don’t have to incubate eggs immediately. Once hatched, you have about a week to choose the eggs you want to incubate. After seven days of storage, eggs are not fresh enough to incubate successfully.
About 24 hours before you are ready to place your eggs, let your incubator start heating up. This will give it the time to reach an optimal, constant temperature and relative humidity to keep the eggs warm when you set the fertile eggs. These parameters change a bit based on the type of incubator you will be using, so be sure to read the instructions on your incubator.
The 21 Days of Hatching Chicken Eggs
When you are ready to start incubating eggs, make sure you place the eggs inside the incubator with the pointed end down. This ensures that the air pocket is on top and that your chicks will hatch in the right direction.
Chickens are flock animals and need companions to be as happy as possible. Set at least six eggs in your incubator. If you set fewer eggs, some or all may not hatch.
Once your incubator is set up, the magic of a chicken egg can begin!
Week One
The first two weeks of incubation are a time of extremely rapid growth! In just three days, the circulatory system will become established. By day four, the brain and body become distinguishable. On day six, wing development is taking off and the egg tooth that will allow the chicks to break out of the egg shells is beginning to develop.

Week Two
By day eight, the wings, feet and toes of the chick are well developed, and you can start to see feather tracts on the growing embryo's back. On day ten, down feathers appear. Calcification of bone begins on day 12 and on day 13, you can start to see some scales on the legs.
Sometime between days nine and 13, candle your eggs to ensure that the embryo is developing. To do this, simply ensure that the room is dark and place a bright light onto the shell surface. You can use a candler or just a flashlight as your light source. You should be able to see some developing structures in the egg, which assures that incubation has been successful so far!
Week Three
The last week of incubation allows the developed chick to grow extremely rapidly and assume a hatching position. This is also the time frame in which the remaining yolk sac, which will provide nutrition over the first 24 hours after hatching, is absorbed into the chick's body.
On day 20, you should start to see your chicks “pipping.” This is when the developed embryo uses its egg tooth to break through the air cell and egg cell.
This is also a great time to start setting up for your freshly hatched chicks! You’ll need some supplies like feeders, waterers, a heat source and chick starter—but you can learn all about that in our blog about caring for day old chicks.
Hatch Day!

Day 21 is when the hatching process typically begins. It may take up to a day for the chicks to completely hatch, and that’s okay!
When they first break out, they will be wet and honestly look a little gross. Leave them in the incubator for 24 to 36 hours to dry completely, and they’ll start looking like the fluffy new friends you were expecting!
If you collected eggs over a couple of days, there may be some chicks that eggs hatch a little later—this is completely normal.
So, there you have it! In three short weeks, you can turn fertilized eggs into cute baby chicks with proper incubation practices.
Baby Chick Nutrition
Did you know that our chicken supplements are beneficial for chickens of any age, including day old chicks? You can start your chicks on the road to the healthiest, happiest life possible on day one with natural chicken supplements.
At Southland Organics, we offer a probiotic for chickens, apple cider vinegar with the mother and vitamins for chickens. These products provide constant gut health and immune support for chicks throughout their lives! Learn more here.
Contact Us
So there you have it—everything you need to know about hatching your chicks at home! We are so excited to hatch our first group of chicks this spring and even more excited to bring you along on this adventure.
If you have any questions about hatching chicks or our products, shoot us an email at [email protected] or call us at 800-608-3755. Be sure to subscribe to our YouTube channel to get updated on our latest chicken raising tips and tricks and product updates.


